
Over time, your once-appealing kitchen worktop can start looking dull, scratched, or heavily stained due to spills, dirt and dust accumulation, and everyday wear and tear. But the good news is that with little effort of sanding, you can bring new life to your worn worktop.
To learn how to do this, check out our blog where we’ve provided a step-by-step guide to sand the kitchen worktop and restore its former beauty. With the help of these steps, you can get a smooth, beautiful worktop that’s ready for years of happy cooking.
Sanding The Kitchen Worktop: Four Proper Steps
1. Get The Worktop Ready
So, let’s start the work with preparing the area. First of all, remove all items from the worktop (including kitchen tools and other utensils) and clean the surface with a vacuum cleaner or dusting cloth.
After that, cover the walls of your kitchen with plastic sheeting or painter’s tape to protect them from dust and other abrasive debris. Don’t forget to make sure you have good ventilation, as this helps you avoid inhaling any harmful particles.
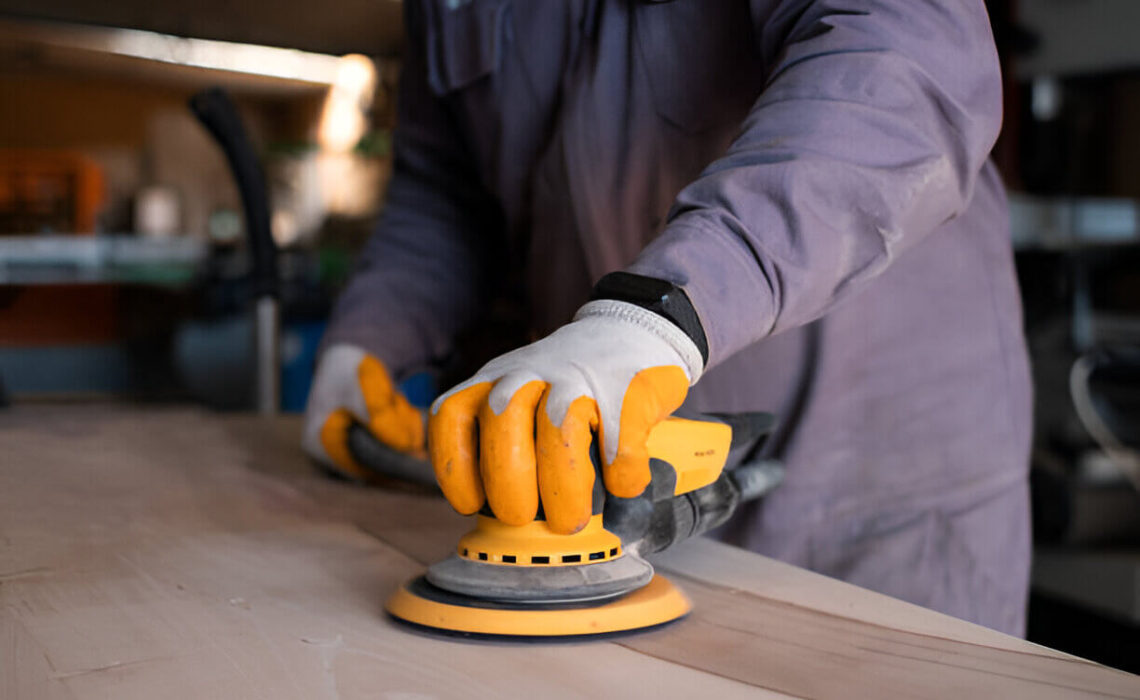
2. Initiate The Sanding
Sanding the worktop with effective results is much easier to visualise than to do practically because, at each step, you have to use appropriate sandpapers. If not done in that way, you could end up with disappointing results. So, follow these steps to learn how to sand the kitchen worktop correctly.
➔ The primary step is to ensure you’ve equipped yourself with safety glasses and a dust mask to keep dusty particles from your health at bay.
➔ Now, start with coarse-grit sandpaper (60-grit) to remove the old finish and smooth out deep scratches or stains. (if you are using a sanding block, wrap the sandpaper around it firmly)
➔ Sand the worktop evenly, moving the sander or sanding block in the direction of the wood grain. Feel free to apply pressure but don’t just press too hard.
➔ Next, shift to using medium-grit sandpaper (120-grit) to further smoothen the surface and get rid of any remaining imperfections.
➔ Lastly, attach fine-grit sandpaper (220-grit) to sand the worktop and obtain an even surface.
Note: You can also read How To Remove Stubborn Stains From Hardwood Floors.
3. Vacuum The Surface
Sanding (even with the finest sandpaper) leaves a lot of fine dust particles. If you don’t clean them up and move on to the next step, these particles can get trapped in the finish, and you may get a rough, uneven texture. Therefore, vacuum the surface thoroughly to remove all sanding dust.
Lastly, inspect the worktop carefully for any rough patches or stain marks before you wrap up. If the surface yet appears harsh, feel free to repeat the process.
4. Apply A Suitable Finish
Applying a suitable finish to your sanded worktop is just as important as the way you choose a finish for your hardwood floor after sanding, as spills and scorch marks (due to hot dishes placed directly on unfinished wood) are most likely to take place in the kitchen.
A finish is like a protective fence that prevents a spill from damaging the surface severely and helps add an extra layer of protection against heat damage.
Moreover, it also hardens the surface, making it more resistant to everyday wear and tear, as sanding often exposes wood, making it more vulnerable to scratches.
It’s A Wrap!
A clean, spotless surface enhances the functionality and aesthetics of your kitchen. However, when scratches, stains, and other imperfections collect over time, sanding the kitchen worktop is necessary to buff away these blemishes and reveal a fresh, clean surface.
In addition to these effective DIY steps, you can also consider hiring professional services to sand the kitchen worktop in minimum time and effort. Every kitchen is unique and by adapting the services to meet your specific needs, Sanding Wood Floors can transform your kitchen into a masterpiece of elegance and functionality with their elite worktop sanding services.
Their team of expert professionals provides years of knowledge to ensure your worktops are sanded to perfection, using the latest techniques and tools to achieve a flawless finish.


